
Packer and Terraform Development - Part 3
The first two parts of this series involved creating a packer image and using the image a terraform infrastructure for developers. In this final part of the series we will conclude with the creation of CI/CD pipelines using Azure DevOps of our packer and terraform infrastructure when files are changed or on demand.
Azure DevOps Pipelines for Packer and Terraform Setup
Before we get going with Azure DevOps pipelines we need to create a service connection to our Azure subscription and also I am using a special terraform marketplace extension we need to install.
Creating a service connection
The first thing we need to do is create a service connection in Azure DevOps for our subscription. To do that once you have an azure devops organization is to do the following
- Login to your organization
dev.azure.com/YOURORGNAME - Select your project
- Go to your project’s settings
- Select under Pipelines the title Service connections
- Select New service connection
- Choose Azure Resource Manager and press
Next - Choose Service principal (automatic) and press
Nextunless your organization has special rules about connecting to Azure. - Select Subscription and pick the subscription you are giving access to pipelines.
- Skip Resource group
- For Service connection name enter the name you want to use to refer to this connection in
Pipelines - Uncheck
Grant access permission to all pipelines
The reason I uncheck the grant access to all pipelines is I like to use the role based security when pipelines are run to grant access. If you don’t do this you are giving anyone with access to your project access to change your subscription with a pipeline they commit.
Adding the custom Terraform tasks
I really like a custom Terraform task extension that is free and on the marketplace. You can find this extension at Azure Pipelines Terraform Tasks by Charles Zipp. To install it select Get it free on the marketplace page and select your organization.
Note if you are not able to add extensions directly to your organization you can at least request it and have an organization administrator approve it and install the extension.
The Packer Azure DevOps CI/CD Pipeline
Our packer file that we created in part one of this series can now be referenced by a Azure DevOps pipeline. Since I created the packer and terraform in the same repository we will actually want to create two pipeline files and do some file based filtering for CI triggers. If you don’t like this you can split the logic from the developer packer and terraform setups into two folders or two different repositories.
To start lets create a YML file for the pipeline that sets up the variables and trigger configuration we need.
azure-pipelines-packer.yml Azure DevOps pipeline definition for Packer:
variables:
- name: deployment_subscription
  value: 'YOUR SERVICE CONNECTION NAME'
- name: packer_template
  value: 'packer-ubuntubase.json'

trigger:
  branches:
    include:
    - main
  paths:
    exclude:
    - terraform-*
    - azure-pipelines-terraform.yml

pool:
  vmImage: ubuntu-latest

pr:
  autoCancel: true
  branches:
    include:
    - feature/*
    - user/*
At the beginning of this file we setup two variables. I find that this makes it easier to copy this pipeline as a template for later use cases when I don’t have constants all over the file. These variables define the service connection name we just created and the name of the packer JSON file definition file.
Next we setup the trigger rules. My current rules state the following:
- This pipeline will trigger automatically on change to code in the branch
mainbut don’t trigger if the file changed starts with terraform- or is the other pipeline we will create for terraform. The reason for this is to not trigger packer changes when only the terraform files have changed. - Next we are going to run this on the latest ubuntu managed agent. The syntax we are going to use in the pipeline will be Linux Bash based commands so we will need to use a Linux agent.
- Finally, we setup PR triggers that state that we should do a Pull Request based qualification build if anyone commits changes to branches that start with feature/ or user/. This is to setup for the future when Pull Requests happen and we prevent pushing directly to main.
Next we finish the packer Azure DevOps pipeline file with the steps to build the packer image.
steps:
- task: AzureCLI@2
  displayName: 'Connect Azure Subscription'
  inputs:
    azureSubscription: '${{ variables.deployment_subscription }}'
    scriptType: 'bash'
    scriptLocation: 'inlineScript'
    inlineScript: |
      subId=$(az account list --query "[?isDefault].id" | jq -r ".[0]")
      echo "##vso[task.setvariable variable=AZURE_CLIENT_ID]$servicePrincipalId"
      echo "##vso[task.setvariable variable=AZURE_CLIENT_SECRET]$servicePrincipalKey"
      echo "##vso[task.setvariable variable=AZURE_CLIENT_TENANT]$tenantId"
      echo "##vso[task.setvariable variable=AZURE_SUBSCRIPTION_ID]$subId"
    addSpnToEnvironment: true

- task: PackerBuild@1
  displayName: 'Packer Build'
  inputs:
    templateType: 'custom'
    customTemplateLocation: '${{ variables.packer_template }}'
    customTemplateParameters: '{"azure_client_id":"$(AZURE_CLIENT_ID)","azure_client_secret":"$(AZURE_CLIENT_SECRET)","azure_client_tenant":"$(AZURE_CLIENT_TENANT)","azure_subscription_id":"$(AZURE_SUBSCRIPTION_ID)"}'
    imageUri: '$imageURL'
  condition: and(succeeded(), eq(variables['Build.Reason'], 'Manual'))

- script: 'packer validate ${{ variables.packer_template }}'
  displayName: 'Packer Validate'
  condition: and(succeeded(), ne(variables['Build.Reason'], 'Manual'))
There are 3 tasks run as steps of this pipeline.
Packer Pipeline: Service Connection and Variables
First, we connect to our azure subscription (using the service connection specified). We are using that service connection to create 4 variables that our packer pipeline will need. Remember when we created our packer pipeline we setup variables that the developer PowerShell setup scripts were providing for developers. Now that we are in the pipeline we need to obtain those same values securely and provide them. For reference, our packer file had these variables at the beginning of the definition:
    "variables": {
      "azure_client_id": "{{env `AZURE_CLIENT_ID`}}",
      "azure_client_secret": "{{env `AZURE_CLIENT_SECRET`}}",
      "azure_tenant_id": "{{env `AZURE_CLIENT_TENANT`}}",
      "azure_subscription_id": "{{env `AZURE_SUBSCRIPTION_ID`}}",
      "managed_image_prefix": "myubuntu",
      "working_directory": "{{env `SYSTEM_DEFAULTWORKINGDIRECTORY`}}"
    },
What we are doing is creating variables on our pipeline agent with the same name as defined in the packer file. The variables we create match the developer environment variable defaults specified in the packer file for clarity. The variables AZURE_CLIENT_ID, AZURE_CLIENT_SECRET, AZURE_CLIENT_TENANT are all provided to us from the Azure CLI task in the variables servicePrincipalId, servicePrincipalKey and tenantId. Azure DevOps itself provides the environment variable named SYSTEM_DEFAULTWORKINGDIRECTORY so we have that one already available. Finally we do an az account command with a little jq to get the current subscription id into the variable AZURE_SUBSCRIPTION_ID.
Packer Pipeline: The Packer Build
Now that we are logged in and have all the variables we need our pipeline is going to run Packer the same way that our developer machine did. It is going to run the packer build command and provide all of these values as template parameters. We are using the built in task named Build Machine Image which in the pipeline is titled PackerBuild@1.
This line…
 customTemplateParameters:
    '{"azure_client_id":"$(AZURE_CLIENT_ID)",
      "azure_client_secret":"$(AZURE_CLIENT_SECRET)",
      "azure_client_tenant":"$(AZURE_CLIENT_TENANT)",
      "azure_subscription_id":"$(AZURE_SUBSCRIPTION_ID)"}'
Is just forwarding all the important pipeline variables to the task. All you need to do is match your names in the packer on the left and variable names being passed to packer. Remember I made the pipeline variables and the developer environment variables the same names in all CAPS to help keep straight where the values are coming from but this isn’t required. What is required is that the packer variable names are the same when we overwrite the environment variables used by developers with the pipeline values.
Packer Pipeline: The Packer Validate Only
You might be wondering why these conditional sections exist condition: and(succeeded(), eq(variables['Build.Reason'], 'Manual')) in the pipeline. Right now what the pipeline is doing is the following:
- If you build the pipeline by manually requesting it then it will run the
Packer Buildstep because theBuild.Reasonwill be equal toManual. - If you trigger it any other way, like through a push or CI it will right now just run a
packer validatecommand.
I do this to not actually execute the Packer image build and just validate unless manually triggered.
Note: Once you get branch policies setup where you are required to use pull requests to go to some branches you can change this
ManualtoPullRequestand then just do validations on certain pull requests vs. the full build. You can read more about these predefined variables on Microsoft Docs in the section titled Build variables (DevOps Services) under Build.Reason). If you do this you need to reverse the logic to the following:
- task: PackerBuild@1
  displayName: 'Packer Build'
  ...
  condition: and(succeeded(), ne(variables['Build.Reason'], 'PullRequest'))

- script: 'packer validate ${{ variables.packer_template }}'
  displayName: 'Packer Validate'
  condition: and(succeeded(), eq(variables['Build.Reason'], 'PullRequest'))
Packer Pipeline: Final Complete Pipeline
Putting this all together you should get the following pipeline definition file (with your change of service connection name in variables).
azure-pipelines-packer.yml
variables:
- name: deployment_subscription
  value: 'YOUR SERVICE CONNECTION NAME'
- name: packer_template
  value: 'packer-ubuntubase.json'

trigger:
  branches:
    include:
    - main
  paths:
    exclude:
    - terraform-*
    - azure-pipelines-terraform.yml

pool:
  vmImage: ubuntu-latest

pr:
  autoCancel: true
  branches:
    include:
    - feature/*
    - user/*

steps:
- task: AzureCLI@2
  displayName: 'Connect Azure Subscription'
  inputs:
    azureSubscription: '${{ variables.deployment_subscription }}'
    scriptType: 'bash'
    scriptLocation: 'inlineScript'
    inlineScript: |
      subId=$(az account list --query "[?isDefault].id" | jq -r ".[0]")
      echo "##vso[task.setvariable variable=AZURE_CLIENT_ID]$servicePrincipalId"
      echo "##vso[task.setvariable variable=AZURE_CLIENT_SECRET]$servicePrincipalKey"
      echo "##vso[task.setvariable variable=AZURE_CLIENT_TENANT]$tenantId"
      echo "##vso[task.setvariable variable=AZURE_SUBSCRIPTION_ID]$subId"
    addSpnToEnvironment: true

- task: PackerBuild@1
  displayName: 'Packer Build'
  inputs:
    templateType: 'custom'
    customTemplateLocation: '${{ variables.packer_template }}'
    customTemplateParameters: '{"azure_client_id":"$(AZURE_CLIENT_ID)","azure_client_secret":"$(AZURE_CLIENT_SECRET)","azure_client_tenant":"$(AZURE_CLIENT_TENANT)","azure_subscription_id":"$(AZURE_SUBSCRIPTION_ID)"}'
    imageUri: '$imageURL'
  condition: and(succeeded(), eq(variables['Build.Reason'], 'Manual'))

- script: 'packer validate ${{ variables.packer_template }}'
  displayName: 'Packer Validate'
  condition: and(succeeded(), ne(variables['Build.Reason'], 'Manual'))
Adding the Packer pipeline to Azure DevOps
With this the entire packer pipeline defined we can add it to Azure DevOps with these steps:
- Login to your organization and project in Azure DevOps
- Select the Pipelines menu option under the Pipelines section
- Press
New pipeline - Select Azure Repos Git and your repository, mine is called
base-ubuntu-infra - Select Existing Azure Pipelines XAML file, your branch (mine is
main) and the file we created/azure-pipelines-packer.yml - Press
Continue - Select the dropdown next to Run and select
Save - Return to the Pipelines menu option under the Pipelines section and select
All - Select Rename/move on your pipelines menu.

- Change the name to include
(Packer)after the name so we can tell it part from the Terraform one and run it independently.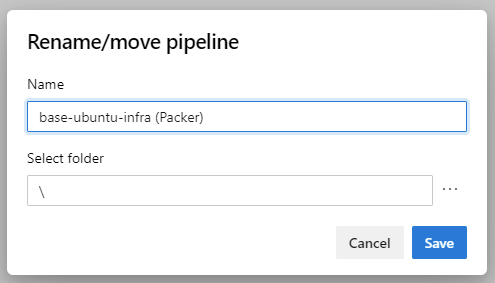
- Select the pipeline again now renamed and select
Run new, branch main, andRun
You should after the pipeline completes have a new base Ubuntu VM image sitting in your azure resource group.
The Terraform Azure DevOps CI/CD Pipeline
The Terraform Azure DevOps pipeline is much like with Packer one but with different tasks for interacting with Terraform. We will be using that marketplace component we installed earlier for the tasks.
Terraform Pipeline: Variables, Setup and Triggers
The Terraform pipeline has the following differences from the Packer pipeline.
- We have added 3 variables that can be set when the Terraform is run. These are
instance_name: The unique base name of the environment and resources being defined.instance_vm_user_name: The VM’s user name to use when logging in, remember the VM uses a private SSH key it generates and puts into Azure Key Value for the “password” side of this login.packer_image: This is the file name of the generated packer Image you want to use for this run. Change this default to your stable version. To find the name look at your OS images resource group after running the Packer pipeline, or in the packer pipeline logs as it is shown at the end of the logs.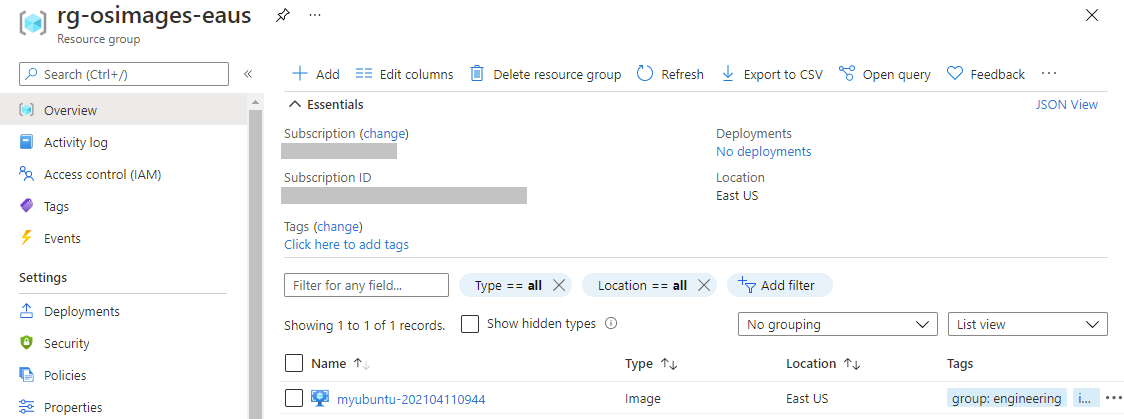
- We added a second variable for the storage account name of where you keep your state. Remember I was using the name
satfstate20210411for this blog but since it needs to be globally unique you will have your own storage account name. Refer to part 2 of this series for how you prepared a storage account for holding Terraform state to find this value. - Finally, our branch path exclusions now exclude triggering this pipeline if the packer files or packer pipeline changes. This is once again because we are in the same repository and don’t want to run the Terraform pipeline when only packer changes.
parameters:
  - name: instance_name
    type: string
    default: exampleub1
  - name: instance_vm_user_name
    type: string
    default: MyUbuntuAdmin
  - name: packer_image
    type: string
    default: myubuntu-202104180826

variables:
- name: deployment_subscription
  value: 'YOUR SERVICE CONNECTION NAME'
- name: state_storage_account_name
  value: satfstate20210411

trigger:
  branches:
    include:
    - main
  paths:
    exclude:
    - packer-*
    - azure-pipelines-packer.yml

pool:
  vmImage: ubuntu-latest

pr:
  autoCancel: true
  branches:
    include:
    - feature/*
    - user/*
Terraform Pipeline: Installing and Initializing Terraform
The first two steps of our terraform pipeline is to install the latest version of Terraform and then using our Azure subscription initialize Terraform using our storage account that hold the Terraform state in Azure. All the values used in the Terraform Init are either variables we defined earlier in the pipeline or are from our configuration names we picked in part 2 of this series.
steps:
  - task: TerraformInstaller@0
    displayName: 'Terraform Version Install'
    inputs:
      terraformVersion: 'latest'

  - task: TerraformCLI@0
    displayName: 'Terraform Init'
    inputs:
      command: 'init'
      backendType: 'azurerm'
      backendServiceArm: '${{ variables.deployment_subscription }}'
      ensureBackend: true
      backendAzureRmResourceGroupName: 'rg-terraform-state'
      backendAzureRmResourceGroupLocation: 'eastus'
      backendAzureRmStorageAccountName: '${{ variables.state_storage_account_name }}'
      backendAzureRmContainerName: 'terraform-state'
      backendAzureRmKey: 'myubuntu.tfstateenv:${{ parameters.instance_name }}'
      allowTelemetryCollection: false
One thing that might not be super obvious is this line…
backendAzureRmKey: 'myubuntu.tfstateenv:${{ parameters.instance_name }}'
What this is doing is stating which Azure backend storage key for “state” should be used for this terraform instance. Following the Terraform naming conventions I use myubuntu.tfstateenv for the name of this infrastructure state file and then suffix it with : and the unique instance name. If you do this then running this pipeline with two different instance_names of demoXYZ1 and prodXYZ1 will use different state files. Also, since developers use their initials for this part a developer’s testing will not mess up the state of a pipeline run.
Terraform Pipeline: Running Terraform Plan
Next comes the Terraform Plan command. Using our state and the target environment this figures out what it needs to add, change and delete to make the terraform environment correct. Once it does that it holds it in a plan file named myubuntu.tfplan in the pipeline agent’s working folder.
  - task: TerraformCLI@0
    displayName: 'Terraform Plan'
    inputs:
      command: 'plan'
      environmentServiceName: '${{ variables.deployment_subscription }}'
      commandOptions: '-var "instance_name=${{parameters.instance_name}}" -var "instance_vm_user_name=${{parameters.instance_vm_user_name}}" -var "packer_image=${{parameters.packer_image}}" -out=$(System.DefaultWorkingDirectory)/myubuntu.tfplan'
      runAzLogin: true
      allowTelemetryCollection: false
      publishPlanResults: 'MyUbuntu'
One thing that is important is the line…
commandOptions: '-var "instance_name=${{parameters.instance_name}}" -var "instance_vm_user_name=${{parameters.instance_vm_user_name}}" -var "packer_image=${{parameters.packer_image}}" -out=$(System.DefaultWorkingDirectory)/myubuntu.tfplan'
It is passing our required and optional variable overrides to the Terraform plan using the names we defined for these variables in the variables.tf file. The last part of the line is saving the plan to the file we specified so we can use it in the Terraform Apply command.
Terraform Pipeline: Running Terraform Apply
Finally, we get to the part of the pipeline where we can apply the Terraform using the Packer image and create the resources in azure. That section looks like the following.
  - task: TerraformCLI@0
    displayName: 'Terraform Apply'
    condition: and(succeeded(), eq(variables['Build.Reason'], 'Manual'))
    inputs:
      command: 'apply'
      environmentServiceName: '${{ variables.deployment_subscription }}'
      commandOptions: '$(System.DefaultWorkingDirectory)/myubuntu.tfplan'
      runAzLogin: true
      allowTelemetryCollection: false
The only special thing in this plan is we are passing the .tfplan file we created in the terraform plan step. Also, like the Packer build note that we are doing a conditional build on it being run manually. If you don’t run this pipeline manually the infrastructure isn’t created and the Terraform is just validated by doing a plan. Just like the Packer we could change this to use ne(… ‘PullRequest’) and have it run only when its not a pull request.
Remember this pipeline creates infrastructure and that can cost you money so take care how often you generate new infrastructure based on CI/CD triggers.
Terraform Pipeline: Final Complete Pipeline
Putting this all together you should get the following pipeline definition file (with your change of service connection name, packer image name and storage account for TF state in variables and parameters).
azure-pipelines-terraform.yml
parameters:
  - name: instance_name
    type: string
    default: demo
  - name: instance_vm_user_name
    type: string
    default: MyUbuntuAdmin
  - name: packer_image
    type: string
    default: myubuntu-202104180826

variables:
- name: deployment_subscription
  value: 'YOUR SERVICE CONNECTION NAME'
- name: state_storage_account_name
  value: satfstate20210411

trigger:
  branches:
    include:
    - main
  paths:
    exclude:
    - packer-*
    - azure-pipelines-packer.yml

pool:
  vmImage: ubuntu-latest

pr:
  autoCancel: true
  branches:
    include:
    - feature/*
    - user/*

steps:
  - task: TerraformInstaller@0
    displayName: 'Terraform Version Install'
    inputs:
      terraformVersion: 'latest'

  - task: TerraformCLI@0
    displayName: 'Terraform Init'
    inputs:
      command: 'init'
      backendType: 'azurerm'
      backendServiceArm: '${{ variables.deployment_subscription }}'
      ensureBackend: true
      backendAzureRmResourceGroupName: 'rg-terraform-state'
      backendAzureRmResourceGroupLocation: 'eastus'
      backendAzureRmStorageAccountName: '${{ variables.state_storage_account_name }}'
      backendAzureRmContainerName: 'terraform-state'
      backendAzureRmKey: 'myubuntu.tfstateenv:${{ parameters.instance_name }}'
      allowTelemetryCollection: false

  - task: TerraformCLI@0
    displayName: 'Terraform Plan'
    inputs:
      command: 'plan'
      environmentServiceName: '${{ variables.deployment_subscription }}'
      commandOptions: '-var "instance_name=${{parameters.instance_name}}" -var "instance_vm_user_name=${{parameters.instance_vm_user_name}}" -var "packer_image=${{parameters.packer_image}}" -out=$(System.DefaultWorkingDirectory)/myubuntu.tfplan'
      runAzLogin: true
      allowTelemetryCollection: false
      publishPlanResults: 'MyUbuntu'

  - task: TerraformCLI@0
    displayName: 'Terraform Apply'
    condition: and(succeeded(), eq(variables['Build.Reason'], 'Manual'))
    inputs:
      command: 'apply'
      environmentServiceName: '${{ variables.deployment_subscription }}'
      commandOptions: '$(System.DefaultWorkingDirectory)/myubuntu.tfplan'
      runAzLogin: true
      allowTelemetryCollection: false
Adding the Terraform pipeline to Azure DevOps
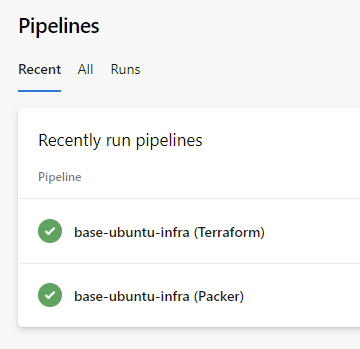
Adding the terraform pipeline follows the identical steps to the Packer pipeline. The only differences are now select the azure-pipelines-terraform.yml file and when you rename it add (Terraform) to the end of your repository name. Once done and run you should have two pipelines.
A reminder about service connection approvals
The first time you run each pipeline it is going to require someone with access approve the pipeline to use the Azure ARM service connection. You will see a message like the following:
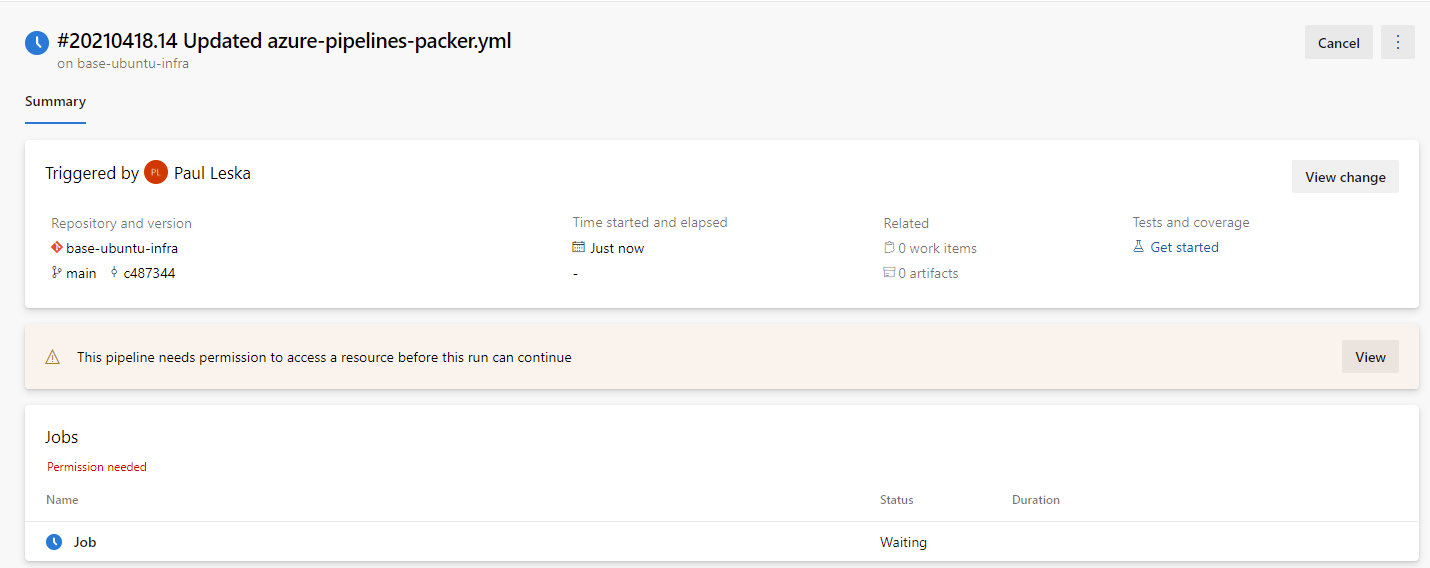
When you press View on that message you will have a button you can (or someone else with rights could) press to approve the pipeline’s access. Until you get the pipeline approved to access the Service Connection it will not run. You can chose to edit the service connection and grant access to all pipelines but I don’t like opening up access that wide.
Wrap-up Development and Pipelines with Packer and Terraform
We have come a long way in these three posts as we now have a way to generate Azure infrastructure that uses pre-defined Packer templates for VM OS images. We also created a Windows based development pattern so that developers can test changes to Packer and Terraform without needing to run the pipelines. We wrapped up the process by setting up CI/CD pipelines that run the Infrastructure as code. In future posts I may come back and use these patterns to build some cool Linux and Windows based infrastructures on Azure.
Happy Packer and Terraforming on Azure.
-Paul